Oscillator Sync in Subtractive Synthesis

Did you ever wonder what oscillator sync does in subtractive synthesis? Simply put, in sync mode oscillator 2 restarts its waveform every time oscillator restarts its waveform. That’s pretty simple to understand, but it is a bit trickier to visualize, and harder still to try to predict what the auditory outcome will be.

Thus, I have done a test of oscillator sync using Logic Pro’s RetroSynth. Each test involves two passes, each of which is 16 seconds long. Both instances use 55 Hz sawtooth waves (A1, where middle C is C4). In the first pass, we are listening only to the synced oscillator. In the second pass, we hear a 50/50 mix of oscillator one and two.

In both cases however, I am automating the sync value. For all intents and purposes, each pass starts out with the frequency of the synced oscillator matching that of oscillator one, and gradually increasing until at the end of the 16 second pass, the frequency of oscillator two is about sixteen times the frequency of oscillator one.

Watching the audio while it plays in Audacity (below), we see on the first pass, long period sawtooth waves gradually shorten into shorter period sawtooth waves. This change will be audible in an apparent rise in frequency. On the second pass, you’ll see these increasingly shorter period sawtooth waves superimposed on the long period sawtooth wave of the first oscillator.

As we watch a spectral analysis of the sound displayed in an EQ plugin on the output channel of Logic Pro (below),  we will see each successive harmonic of the 55 Hz fundamental rise in volume as the first pass progresses.  You’ll notice that the rate of those harmonic peaks increases over the course of the pass. This illustrates that the sync knob of RetroSynth is exponential in nature, that is it moves up the frequency spectrum using consistent octaves, not consistent frequency bands.  For instance in first octave of motion (55 Hz through 110 Hz), we have two harmonics represented (55 Hz & 110Hz). In the second octave of motion (110 Hz- 220 Hz), we have three harmonics represented (110 Hz, 165 Hz, and 220 Hz). In the next octave (220 Hz through 440 Hz) we have 5 harmonics presented (220 Hz, 275 Hz 330 Hz, 385 Hz, and 440 Hz), and so forth. Thus, more harmonics are presented in the same span of time, giving the aural impression of speeding up. You should hear these harmonics cycle though the harmonic series. On the second pass, you’ll see the same thing, only with the fundamental 55 Hz tone constantly there, softening the feeling of the frequency increasing a bit.

Ultimately, the increased angularity of the sound waves, as seen in Audacity results in a richer harmonic content (as seen in the harmonic analysis). This demonstrates the point of Oscillator sync in subtractive synthesis, namely to create richer harmonic content than what is available in the basic waveforms of subtractive synthesis.

The Joy of Hawaiian Lap Steel Guitar

I treated myself over spring break and bought a Rogue RLS-1 Lap Steel Guitar.  At the risk of sounding like an advertisement, I got a good deal on it, and you get a lot for your money. It comes with a stand and a soft case that holds both the instrument and the legs for the stand. While there are a number of online reviews that complain that the stand is ‘shaky,’ I have no such problem with the instrument that I bought.

There dozens of ways to tune a lap steel guitar, with about half a dozen of them being common. I want to focus on a single tuning system so that I might be able to improvise more proficiently at some point. I’ve selected C6 tuning (C, E, G, A, C, E – bottom to top), as it is easy to get both major and minor chords by playing the bottom three or top three strings respectively.

However, before being able to improvise or write original music for the instrument, it would be wise to get some basic experience playing the it. I am focusing on learning Hawaiian lap steel guitar, as I am a long time fan of Hawaiian string music.  As I put it to my wife years ago, “it’s like a mini-vacation for your ears.”

I bought a copy of The Art of Hawaiian Steel Guitar by Stacy Phillips. It is a great book.  It starts with a couple of pages about the history of Hawaii. It then covers the history of Hawaiian music.  In particular it focuses on how traditional vocal styles can be heard in the later developed steel guitar stylings.

Phillips then moves on to common playing techniques in Hawaiian lap steel playing, along with an explanation of the tablature he uses in the rest of the book.  Tablature makes it much easier for a beginner to get started, because it is essentially a graph telling you where to put your fingers at what times.  However, tablature is fairly useless if you try to switch instruments, or as we will see later, tuning systems.  That being said, Phillips presents songs in a general order of increasing difficulty, and introduces each song noting what are the challenges to playing each.  He also gives a historical background of each song, and identifies notable recordings, including any that he has based his transcription from.

Unfortunately for me, Phillips has chosen to put most of the tunes in traditional open G tuning (G, B, D, G, B, D bottom to top), as I want to focus on C6 tuning, Thus, for every tune, I have to translate it into traditional musical notation, and then annotate it to indicate playing information, such as what fret number the slide should be at (indicated in Roman numerals), and what string number is played (indicated using Arabic numerals).  Thus far, I’ve been able to translate the first three songs from the book into C6 tuning. While I haven’t mastered any of these tunes yet, I am starting to make progress, and can imagine a time where I might start to get some of this to sound decent.

Building an Electric Cello

I used to play cello when I was in my early teens. For the past several years I’ve wanted to start playing cello again. However, the problem is that I currently don’t have proper storage space for an acoustic cello. Besides taking up space, an acoustic cello has to be treated tenderly. While it is not super fragile, it is not the sort of instrument that you want to just aggressively shove into a closet. I realized that a solid body electric cello, when put in a soft case, could be shoved in a closet without much fear of damage.

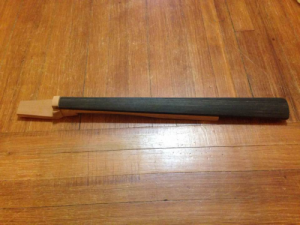
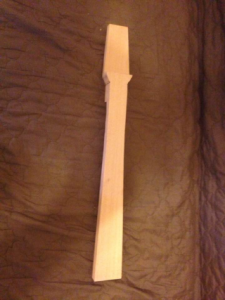
Photo 1: Rough cut of the neck / head.

The one thing I hate about acoustic cellos is the wooden tuning pegs. Anytime there is a drastic change in humidity the instrument can go greatly out of tune, and it can be very difficult to get it to stay in tune. Thus I looked for electric cellos that had electric bass style tuners. I could only find one such instrument in my price range, and the online reviews were not great.

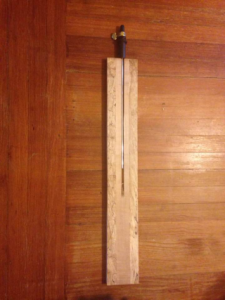
Photo 2: Neck / Head with nut and purchased fingerboard attached.

Photo 3: One of the boards for the body with a channel cut for the endpin.

Thus, with Professor Gernes serving as an advisor, I decided to build an electric cello. I found a design online that seemed suitable. I made a couple of changes. I decided to make the head and neck out a single piece of wood instead of using separate pieces. I also decided to make the body a little thicker, and make it out of two pieces of wood, which allowed me to cut a channel down the center of the instrument, yielding a place to put an endpin.

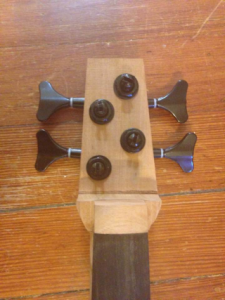
Photo 4: A test to see if the tuners fit.

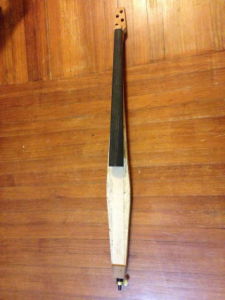
Photo 5: Neck / head assembly attached to the body (via a neck plate), with the endpin inserted. Note the piece of wood added to the body near the endpin (the wood seemed a little narrow on the face where the endpin is, so I thickened it a bit).

The design I used did not account for a solution for a belly rest or a place for the legs to grip the instrument like an acoustic cello. Several people online came up with their own solution to the problem, but I did not like any of the solutions I saw. Eventually I came up with the idea of bending copper pipe in the same manner of the volume antennae for a theremin, allowing for a lightweight modular way to build out from the instrument. However, I was not able to bend the pipe with a tight enough radius without putting kinks in the pipe (even though I had used a set of pipe bending tubes). I came up with the solution of using small pieces of wood that would be connected to the body using copper pipe, utilizing compression fittings attached to the side pieces and body of the cello.

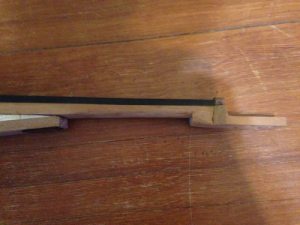
Photo 6: A profile of the neck showing the cut down from the neck to the head. Note that I later carved down the connection between the neck and head so that it is smoother.

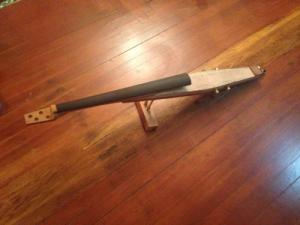
Photo 7:  Here I’ve added compression fittings to the body for the side pieces and the belly rest, with the belly rest in place using copper pipe to connect it.

I built the instrument using a small amount of finished pieces. I bought a fingerboard, an endpin assembly, a bridge, tuners, and a tailpiece (though I have been carving a tailpiece that I may use to replace the manufactured one I’ve been using at some point). The piece is finished using five coats of tru-oil. One mistake I’ve made in building the instrument is that the strings a bit high off of the fingerboard near the nut. This is easily fixable though by simply filing down the grooves for the strings in the nut. Initially, I made the mistake of buying cheap tuners. This made it so I could not bring the A string up to pitch. Since these photos I have replaced the tuner on the A string allowing me to bring it up to pitch.

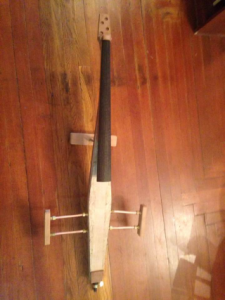
Photo 8: Side pieces and belly rest are added. Note that the side pieces and belly rest can be easily removed for compact storage.

Photo 9: Here is the instrument after adding five coats of Tru-Oil, but before adding the strings, bridge, and tailpiece.

Electrifying the instrument is easy. I attach a clip on microphone made by Korg to the bridge, and I run that into a pre-amp. The output from the pre-amp can either be fed into a guitar pedal, or straight into an amplifier. The instrument actually sounds pretty darned good, but I won’t post an audio file yet, as I’ve barely begun to practice.

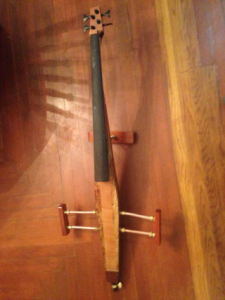
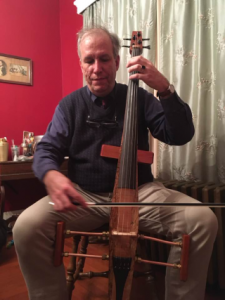
Photo 10: Here is a photo of my first test of the instrument. Note that the clip on microphone is not attached, and that the side pieces may need to be shortened slightly.